軽量・堅牢なWEBサーバのnginxをRasPiにインストール
インストール
$ sudo apt install nginx設定ファイル
/etc/nginx/nginx.confドキュメントルート
HTMLや画像データなどを置く場所
/var/www/html軽量・堅牢なWEBサーバのnginxをRasPiにインストール
$ sudo apt install nginx/etc/nginx/nginx.confHTMLや画像データなどを置く場所
/var/www/htmlマウスカーソルを一定時間の無操作後に消すユーティリティ
$ sudo apt install unclutter自動ログインするユーザのホームディレクトリに設定ファイルをコピーする。
$ cp /etc/xdg/lxsession/LXDE-pi/autostart ~/.config/lxsession/LXDE-pi/ディレクトリがデフォルトでは無いので、自分でつくる必要あり
コピーしたautostartファイルを以下の様に編集
#@lxpanel --profile LXDE-pi
#@pcmanfm --desktop --profile LXDE-pi
#@xscreensaver -no-splash
#point-rpi

@xset s off
@xset -dpms
@unclutter -display :0 -idol 3 -root -noevents
@chromium-browser --kiosk --start https://www.google.co.jp
例として、起動後、全画面でhttps://www.google.co.jpを表示するように設定。任意のURLに書き換える。
設定後、再起動
autostartファイルの編集内容について
#@lxpanel --profile LXDE-pi
#@pcmanfm --desktop --profile LXDE-pi
#@xscreensaver -no-splash
#point-rpi@xset s off
@xset -dpms@unclutter -display :0 -idol 3 -root -noevents@chromium-browser --kiosk --start https://www.google.co.jpキオスクモードは、F11が押されても、全画面表示が終了しない
Via! https://gist.github.com/rampfox/085bf3ffb9ff51e114bf7afdf3ced71b
$ vcgencmd display_power {0|1}0: OFF
1: ON
RasPiのGPUを有効にする方法。
インストール初期状態のRasPiはGPUが有効になっていないため、ブラウザベースでも10FPSぐらいしか出ない。
RasPiの設定画面を開く
$ sudo raspi-config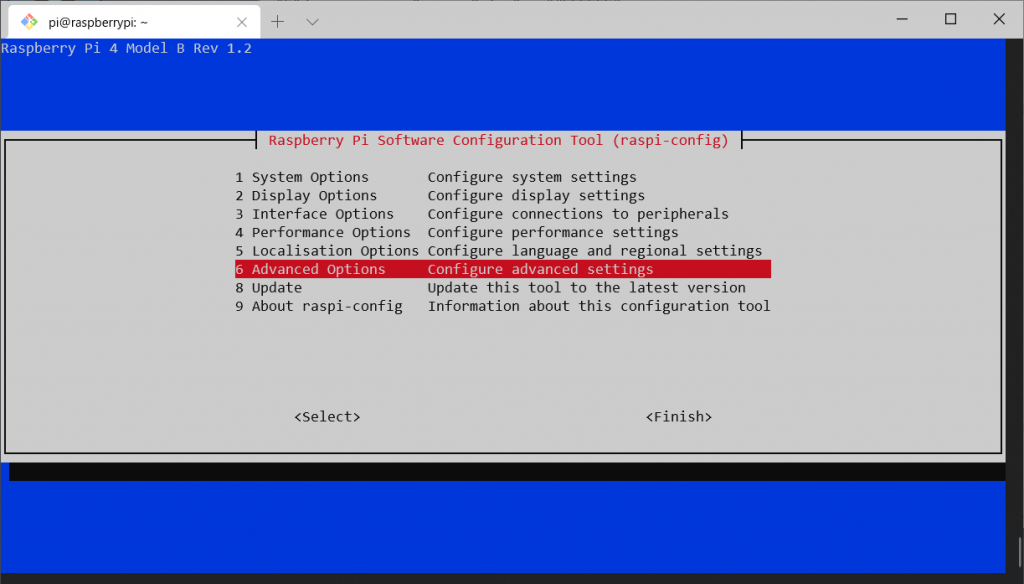
”6 Advanced Options”を選択
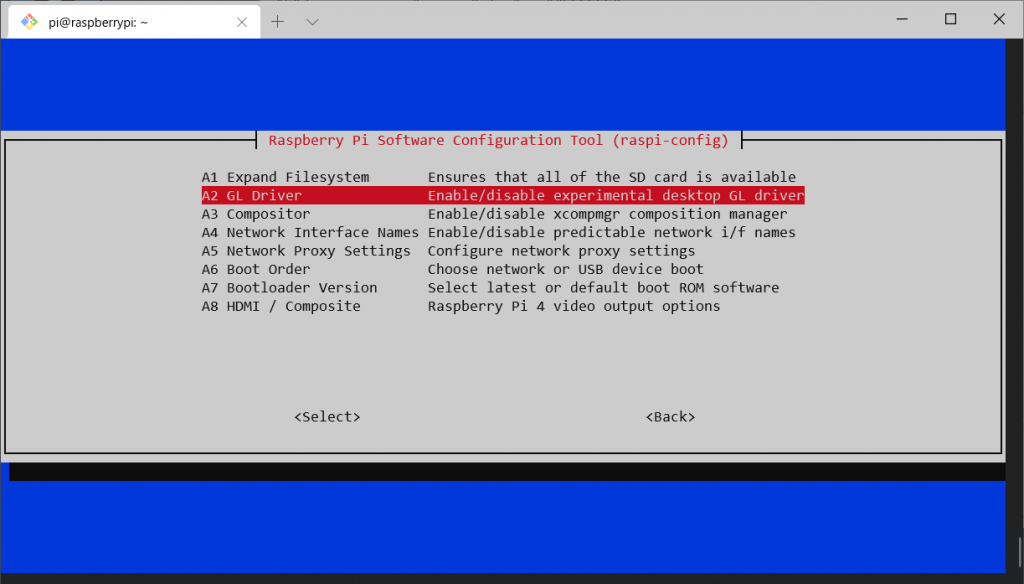
“A2 GL Driver”を選択
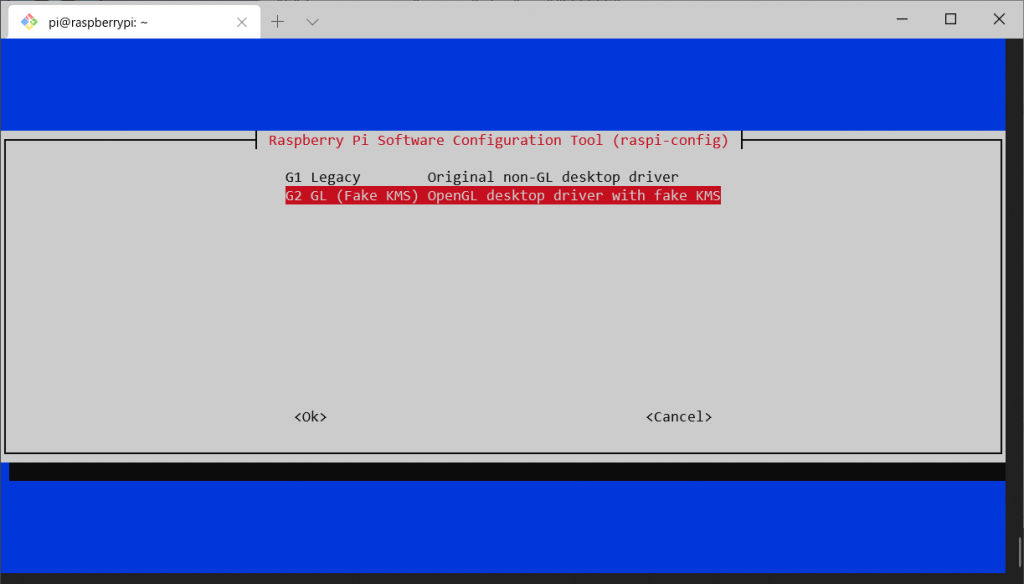
デフォルトでは、Legacyが選択されているので、G2 GL (Fake KMS) OpenGL desktop driver with fake KMSを選択。
GPUが有効になって、アクセレーションが有効になっているかは、Chromiumから確認できる。以下のURLを開くと、設定状況が表示される
chrome://gpu/Raspberry Pi 2 Model Bの初期設定はDHCPになっているが、固定IPアドレス化する。Raspbianのバージョンは、Jessie。
なぜか、普通のDebian風に、/etc/network/interfacesを書き換えるのでは、反映されない。CentOS系の場合は、/etc/sysconfig/network-scripts/ifcfg-eth0など。
Jessieの場合は、/etc/dhcpcd.confを設定する
例えば、端末に192.168.1.2を振り、ルーターが192.168.1.1の場合
interface eth0
  static ip_address=192.168.1.2/24
  static routers=192.168.1.1
  static domain_name_servers=192.168.1.1